既に私をTwitterでフォローしてくださっている方はご存知なのですが、先月からこれまで投稿した「フランスの最も美しい村」関連の投稿をランダムでツイートするTwitter botが稼働しております。
こんな村にご訪問はいかが?:Salers(サレール)- フランスで最も美しい村巡り2010 No.8-★★★★☆ https://t.co/5RIEf6uIfH #フランス pic.twitter.com/0NhjpT1qkY
— KOMATA.Y (@yuukoma) February 7, 2016
今回は簡単にこれをどのように作ったのかを書いてみます。以下、少々技術的な話となります。といっても私はエンジニアではないのでその道の人がみたら「なっていない」書き方かもしれませんがそれはご容赦ください。また、当ブログはWordPressを利用しています。その関係でphpを使ってボットを作っています。
Why did you make it yourself?
程よいWordPressのプラグインがなかったからです。多くのプラグインでは[highlight]「特定のカテゴリーを選ぶ」ではなく「特定のカテゴリーを除く」[/highlight]という仕様が多かったからです。また、[highlight]サムネイル画像をツイートするプラグインもなかった[/highlight]がなかったのも一因です。せっかくなので勉強を兼ねて自作してみることにしました。
Basic flow
The basic flow of creation is as follows.
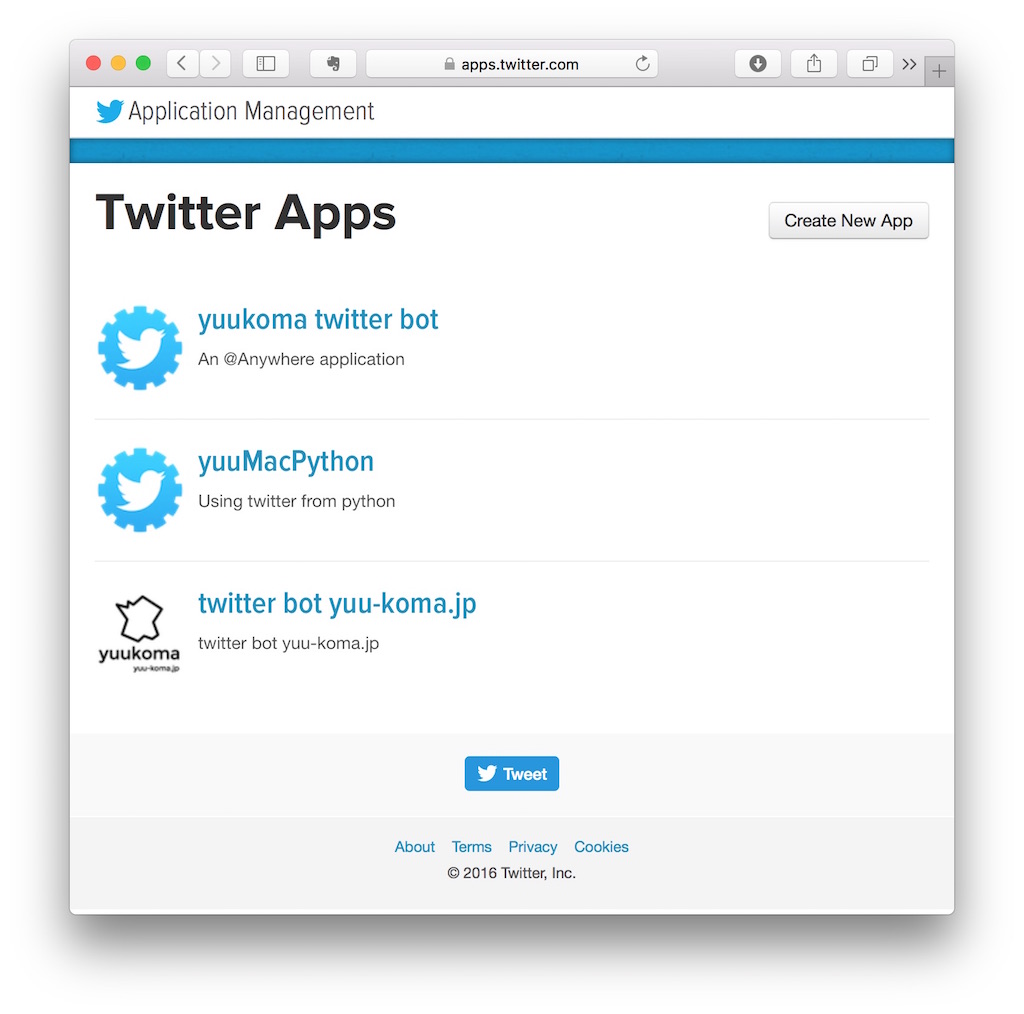
- Twitter Application Management より、新しいアプリを作成
- Twitter Application Management より、作成したアプリの各種トークンを取得
- TwitterOAuthライブラリーをダウンロード
- WordPressのデータベース(MySQL)から直接データ(タイトルとそのアイキャッチ画像)を取得するsqlを書く
- ツイートを行うためのphpを書く
- レンタルサーバーのcronを設定する
1. create a new app from Twitter Application Management
初めにTwitter Application Managementに行き、“Create New App”のボタンを押して新しいアプリを作成します。指示に従えば簡単に手続きが完了し、トップページの「Twitter Apps」に追加されたアプリが表示されるはずです。
2. get various tokens of the application from Twitter Application Management
続いて作成したアプリの各種トークン」を取得します。トップ画面から作成したアプリを選択、[highlight]“Keys and Access Tokens”[/highlight]というタブがあるのでそれを選択。
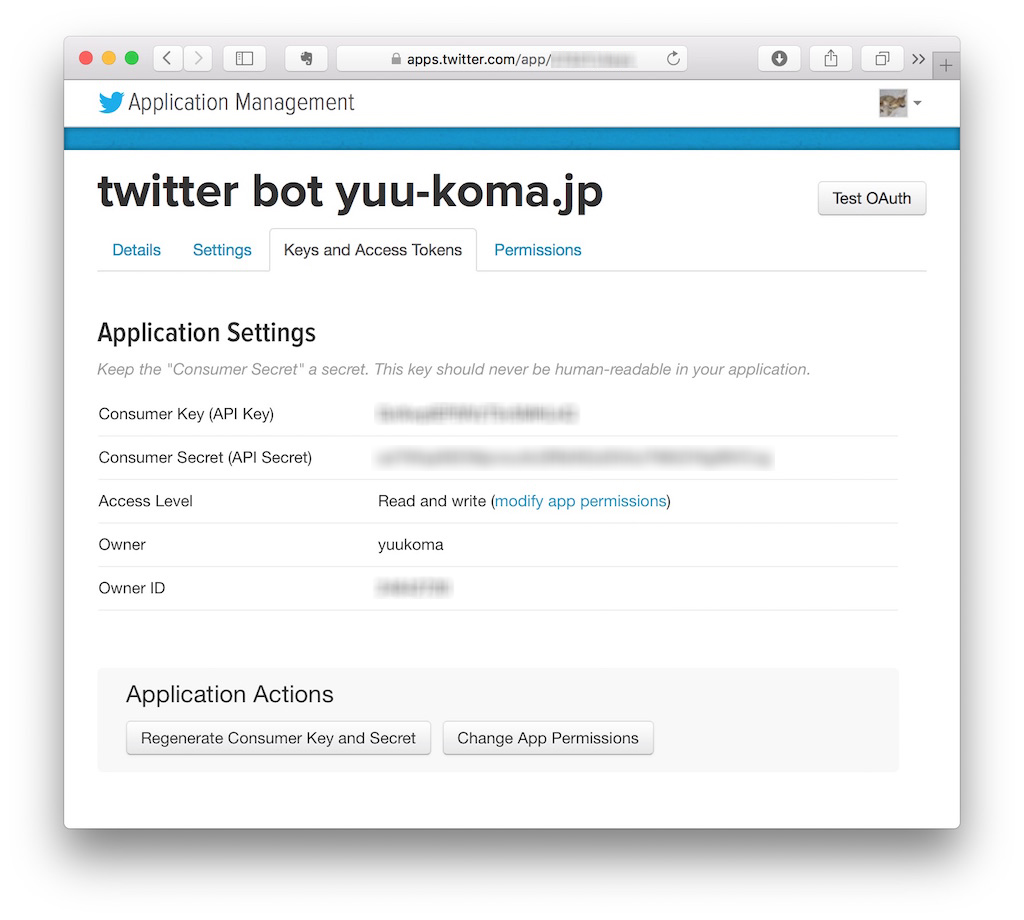
The following information is stored and recorded.
$consumer_key = "######################";
$consumer_secret = "###########################################";
$access_token = "########-#####################################";
$access_token_secret = "########################################";
なお“Permission”は、書き込みができるタイプ(Read and Write / Read, Write and Access direct messages)を選んでおきましょう。
3. download the TwitterOAuth library
こちらからTwitterOAuthライブラリーをダウンロードして適当な名前のフォルダ名(僕は“twitteroauth”にしました)で保存します。
GitHub – abraham/twitteroauth: The most popular PHP library for use with the Twitter OAuth REST API.
4. write a sql to get data directly from WordPress database.
Get the categories belonging to “The most beautiful villages in France” from WordPress database. In my case, I chose to get the post data (title, URL, eye catching image) directly from the WordPress database (MySQL) with sql.
It might be because I didn’t put php for bot in the folder where WordPress is installed, or because the functions defined in WordPress (query_posts, get_post_thumbnail_id, etc.) didn’t work properly. It’s because they didn’t work properly. To do this, you need to know the structure of the WordPress database.
I decided to use the following method to get the post data.
- 4-1. wp_term_taxonomyからカテゴリーIDとタクソノミーIDを照合
- 4-2. wp_term_relationshipsから特定のタクソノミーIDからランダムに1つのレコードを取得
- 4-3. wp_postmetaからアイキャッチ画像のIDを取得
- 4-4. wp_postsから抽出した記事の投稿タイトルとURLを取得
- 4-5. wp_postsから抽出した記事のアイキャッチ画像のURLを取得
Let’s look at them one by one below.
4–1. wp_term_taxonomyからカテゴリーIDとタクソノミーIDを照合
まず下準備として、WordPressのダッシュボードなどでTweetの対象となるカテゴリーNoを取得します。僕のフランスの最も美しい村の例ではcat = 696となります。なお「カテゴリーID」はURLからも調べられます。[highlight]“https://fr.yuukoma.me/?cat=696”[/highlight]←このようになっていますよね。
You’ll need to access the database directly using phpmyadmin or ssh. I use ssh to access it.
さて、まずここでやっかいなのは、[highlight]WordPressのデータベースから特定のカテゴリーの投稿をピックアップするためには、ダイレクトに「カテゴリーID」を指定するのではなく、そのカテゴリーの上位概念である「タクソノミーID」を指定しなければならないこと[/highlight]です。なお、タクソノミーおよびカテゴリーの関係がどのようなものかはここでは説明を省略します。
下準備で調べた「カテゴリーID」とそれに対応する「タクソノミーID」の関係は、[highlight]「wp_term_taxonomy」[/highlight]というテーブルで調べることができます。このテーブルでは、
- カテゴリーID: term_id
- タクソノミーID: term_taxonomy_id
This corresponds to So, to find out the term_taxonomy_id, you can try to run the following sql. (In the example below, term_id=696.)
mysql> select * from wp_term_taxonomy where term_id=696;
+------------------+---------+----------+-------------+--------+-------+
| term_taxonomy_id | term_id | taxonomy | description | parent | count |
+------------------+---------+----------+-------------+--------+-------+
| 739 | 696 | category | | 324 | 102 |
+------------------+---------+----------+-------------+--------+-------+
1 row in set (0.00 sec)
Since the second column (field) is the category ID: term_id, the corresponding taxonomy ID: term_taxonomy_id=739.
4–2. 特定のタクソノミーIDからランダムに1つのレコードを取得
続いて、[highlight]「wp_term_relationships」[/highlight]でterm_taxonomy_id=739を抽出。これでterm_taxonomy_id=739に属する投稿記事IDを取得することができます。どうせ1つしか使わないので、この段階でrandomに取得して一番上のみを取ってくることにしました。
mysql> select object_id from wp_term_relationships where term_taxonomy_id=739 order by rand() limit 1;
+-----------+
| object_id |
+-----------+
| 7896 |
+-----------+
1 row in set (0.00 sec)
This object_id will be the ID of the post. From now on, we’ll use post_id=7896.
4–3. アイキャッチ画像のIDを取得
アイキャッチ画像を取得するのは少々やっかいでした。まず上で取得した投稿ID(この例ではpost_id=7896)に対応するアイキャッチ画像のID: _thumbnail_id」を[highlight]「wp_postmeta」[/highlight]から取得する必要があります。
mysql> select meta_value from wp_postmeta where meta_key='_thumbnail_id' and post_id=7896;
+------------+
| meta_value |
+------------+
| 9789 |
+------------+
1 row in set (0.00 sec)
This meta_value corresponds to the ID of the eye-catching image (in this case, meta_value=9789). I’ll write it down for now.
詳細は前述のデータベース構造のサイトを見ていただくとして、その仕組をざっくり言いますと、一つの投稿にはいろいろな情報、すなわち投稿内容はもちろんのこと、投稿された時間、投稿した人、カテゴリーやタグ、そしてアイキャッチ画像情報、が含まれています。つまり一つの投稿IDにはいろいろな情報(より上位の概念としてはカスタムフィールドと呼ばれています。)に関するIDが紐付いているわけです。それを管理しているテーブルが[highlight]「wp_postmeta」[/highlight]、投稿ID(post_id)に関連する情報の属性を格納しているフィールドが[highlight]「meta_key」[/highlight]、そしてこの中でアイキャッチ画像に該当するのが[highlight]「meta_key=’_thumbnail_id’」[/highlight]というわけです。
4–4. wp_postsからツイートで必要なものをピックアップ
ここまでくれば後はシンプル。投稿に関するデータを格納している[highlight]wp_posts[/highlight]から必要なものをピックアップするだけです。フィールド名(ここではpost_id=IDとなっています。)に注意して以下のようなsqlを実行。
mysql> select post_title, guid from wp_posts where ID=7896;
+-----------------------------------------------------------------------------+--------------------------------+
| post_title | guid |
+-----------------------------------------------------------------------------+--------------------------------+
| Riquewihr - Tour of the most beautiful villages in France 2011 No.44 -★★★★☆ | http://www.yuu-koma.jp/?p=7896 |
+-----------------------------------------------------------------------------+--------------------------------+
1 row in set (0.00 sec)
これでタイトルとURLが取得できます。なお、僕の場合はMySQLデータベースのエンコードをShift-JISに指定ため、エンコードを変換しなければいけないという問題が生じています。UTF–8でデータベースを構築していれば問題はないはずです。WordPressを始めた当初、こうした知識がなくて未だに苦労しています。実際エンコード(文字化け)の問題を解決するのに苦労しました。(解決方法は後述するphpを御覧ください。)
I’ve also been working on converting http to https since the fall of 2015, since I’ve been using SSL support (https). (Please refer to the php below)
4–5. wp_postsから抽出した記事のアイキャッチ画像のURLを取得
最後にアイキャッチ画像のURLを取得します。このIDは投稿IDではなく[highlight]アイキャッチ画像のID(ここではmeta_value=9789)[/highlight]を使います。
mysql> select guid from wp_posts where ID=9789;
+---------------------------------------------------------------------------------+
| guid |
+---------------------------------------------------------------------------------+
| https://yuukoma.me/photo/uploads/2011/09/6123327639_8d2f4fd009.jpg |
+---------------------------------------------------------------------------------+
1 row in set (0.00 sec)
That’s it for accessing the WordPress database and picking up what you need.
5. write php for tweeting
I wrote the following php. As a bonus process, I randomized the message at the beginning, added a hashtag (#France), etc.
In addition, the method to connect to MySQL by php is different by the version of php, so please change it according to your environment. I’m using php5.5. I’m on php5.5 (probably old…)
[php]
<?php
// Connect to MySQL
require("dbinfo.php");
$con=mysql_connect($sv, $uid, $pwd);
if (! $con) {
die(‘Not connected : ‘ . mysql_error());
}
$db_selected = mysql_select_db($db, $con);
if (! $db_selected) {
die (‘Can’t use db : ‘ . mysql_error());
}
mysql_select_db($db, $con);
// Get one post_id at random, given term_taxonomy_id
$sql = "select object_id from wp_term_relationships where term_taxonomy_id=### order by rand() limit 1;";
$result = mysql_query($sql);
$row = mysql_fetch_assoc($result);
$post_id=$row[‘object_id’];
// Get the ID of the eye catching image
$sql = "select meta_value from wp_postmeta where meta_key=’_thumbnail_id’ ";
$sql = $sql . "and post_id=" . $post_id . ";";
$result = mysql_query($sql);
$row = mysql_fetch_assoc($result);
$thumbnail_id=$row[‘meta_value’];
// Get the post title and URL of the extracted post from wp_posts
$sql = "select post_title, guid from wp_posts ";
$sql = $sql . "where ID=" . $post_id . ";";
$result = mysql_query($sql);
$row = mysql_fetch_assoc($result);
// Encoding measures
$post_title = $row[‘post_title’];
$post_title = mb_convert_encoding($post_title, "utf-8");
// http -> httpsに変換
$post_link = $row[‘guid’];
$post_link=str_replace("http://", "https://", $post_link);
// Get the URL of the eye catching image of the post extracted from wp_posts
$sql = "select guid from wp_posts ";
$sql = $sql . "where ID=" . $thumbnail_id . ";";
$result = mysql_query($sql);
$row = mysql_fetch_assoc($result);
$eye_img = $row[‘guid’];
// for text with image
$text = array();
$text[0] = "フランスの美しい村の投稿から:";
$text[1] = "こんな村にご訪問はいかが?:";
$text[2] = "コンプリートした美しい村をご紹介:";
$text[3] = "村ごとに「色」が違うんです:";
$text[4] = "ひとつひとつの訪問が財産になっています:";
if(shuffle($text)) {
$message = $text[0];
}
// Loading the OAuth script
require_once(‘twitteroauth/autoload.php’);
use Abraham\TwitterOAuth\TwitterOAuth;
$consumer_key = "######################";
$consumer_secret = "###########################################";
$access_token = "########-#####################################";
$access_token_secret = "########################################";
// tweet
$connection = new TwitterOAuth($consumer_key,$consumer_secret,$access_token,$access_token_secret);
if($connection) {
$content = $connection->get("account/verify_credentials");
$message = $message . $post_title . " " . $post_link . " #フランス";
$media = $connection->upload("media/upload",array(‘media’ => $eye_img));
$parameters = array(
‘media_ids’ => implode("," , array($media -> media_id_string)),
‘status’ => $message
);
$result = $connection->post("statuses/update",$parameters);
}
?>
[/php]
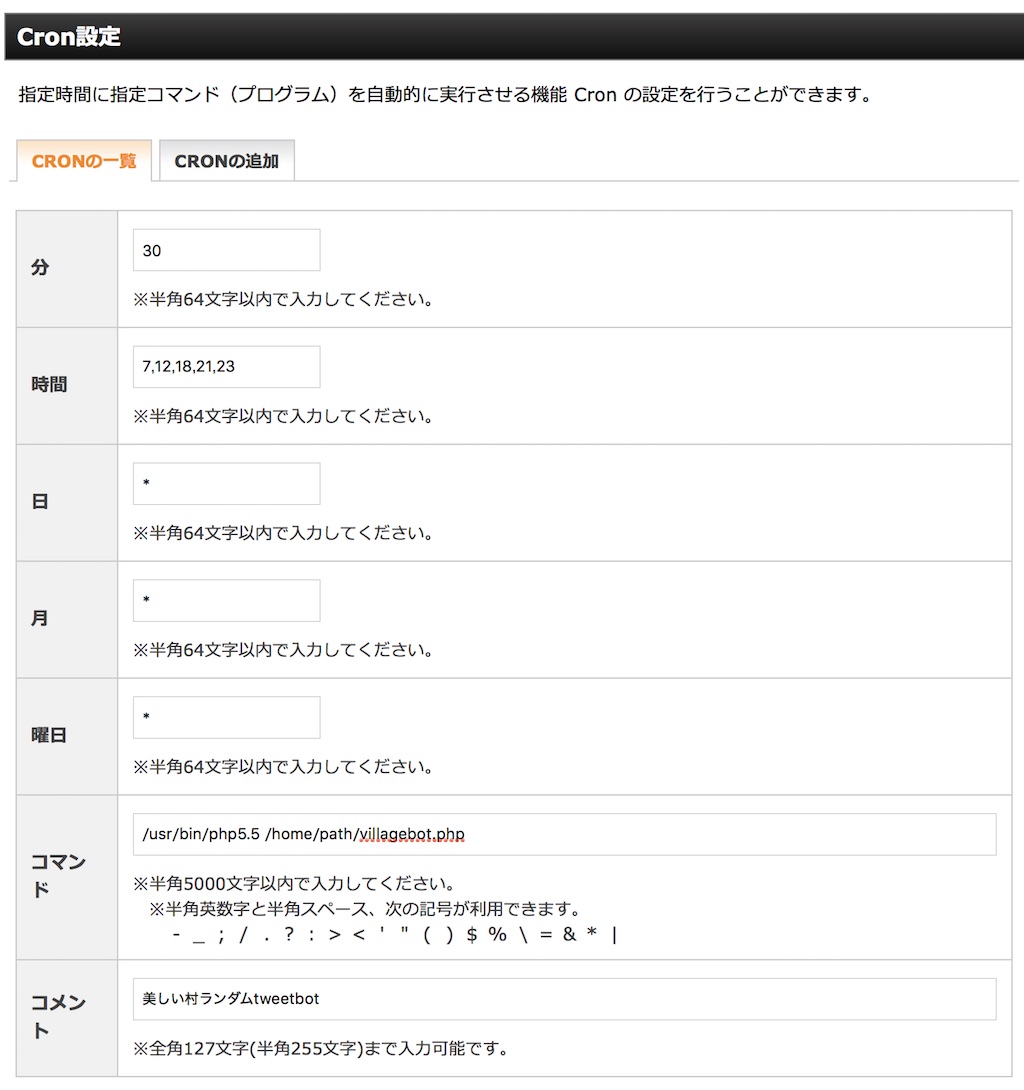
6. set up the cron of the rental server
最後にレンタルサーバーのcronを設定します。path、設定方法はサーバー(レンタルサーバー)ごとに違いますので、適宜変更してください。以下は私が使っているエックスサーバー
![]() での例です。
での例です。
/usr/bin/php5.5 /home/path/villagebot.php
This is how to create a bot.
To be honest, I don’t understand the mechanism of TwitterOAuth, but the bot seems to be working well so far. It seems that tweets with pictures are more popular. However, I think random processing of sql is not so good. It’s difficult to find out random numbers, but I’d like to make a new idea if I have enough time.
なお、フランスの美しい村botの他に[highlight]「世界遺産bot」[/highlight]も検討中です。乞うご期待。